
How To Translate Facebook Posts Without Clicking See Translation
If you’re tired of repeatedly clicking "See Translation" on Facebook posts, there are easier ways to automatically translate content as you scroll. Here’s how you can streamline translations:
- Browser Tools: Use built-in translation features in Google Chrome, Microsoft Edge, or Safari to translate entire Facebook pages automatically. Chrome, for example, lets you enable automatic translations for specific languages.
- Third-Party Extensions: Tools like BeLikeNative offer more precise translations tailored to US English, with options to adjust tone and style for casual or professional use.
- Mobile Features: Both Android and iOS devices provide built-in translation tools for posts, comments, and even text within images.
These methods save time and improve accuracy, especially if you frequently interact with multilingual content on Facebook. Below, we detail how to set up and use these tools effectively.
Facebook’s Built-In Translation Limitations
How Facebook’s "See Translation" Works
Facebook’s AI handles translations across more than 160 languages. When you come across a post in a language you don’t understand, the platform’s AI steps in. A "See Translation" button appears, and with a click, the system translates the text directly between the two languages – skipping English as an intermediary.
Every day, this AI processes a staggering 20 billion translations. It draws from billions of sentence pairs sourced from the web, sorted by geography and regional language patterns to improve its results. Angela Fan, a lead researcher at Facebook AI, explained the rationale behind this approach:
"What I really was interested in was cutting out English as a middle man. Globally there are plenty of regions where they speak two languages that aren’t English".
While this method marks a step forward, it still has its share of issues.
Problems with Facebook’s Translation Feature
Accuracy remains a sticking point. Critics argue that even with evaluations by bilingual volunteers, subtle nuances in translations often go unnoticed. Dialects pose another challenge – take Arabic, for example. Moroccan Arabic can differ so much from Yemeni or Libyan Arabic that speakers might struggle to understand one another.
Regional and content-based restrictions add to the hurdles. Certain features of Facebook’s automatic translation aren’t available in places like South Korea, Brazil, or parts of the European Union. Additionally, posts about social issues, elections, or politics often have translation disabled . If a language isn’t supported – or if you’ve opted out of translations for specific languages – the "See Translation" button may not even show up.
When to Use External Translation Tools
To work around these limitations, external translation tools can be a lifesaver. These tools offer a smoother experience by automating translations without relying on Facebook’s built-in system.
For professional interactions on Facebook – like networking or client communications – you might need more precision, especially when it comes to tone or formality. External tools provide this flexibility.
Browser-based tools and extensions can translate your entire Facebook feed as you scroll. They also bring extra features that Facebook lacks, such as translating text in images using OCR technology or ensuring consistent translations of technical terms through custom glossaries. For everyday users, these tools save time and often deliver translations that feel more polished and accurate.
Browser Translation Tools for Facebook
Browser Translation Tools Comparison for Facebook Posts
Google Chrome‘s Built-In Translation
Google Chrome comes with a built-in translation feature powered by Google Translate, so you don’t need to install any additional extensions. When you visit a Facebook page in a language you don’t understand, Chrome automatically shows a pop-up near the address bar offering to translate the page to English. A simple click on the pop-up does the trick.
If you want to skip this step in the future, head over to Settings > Languages and enable Use Google Translate. From there, add your preferred languages under "Automatically translate these languages." Once set, Facebook posts in those languages will automatically translate as soon as the page loads – no need to click "See Translation" anymore.
Want to translate just one post? Highlight the text, right-click, and choose Translate selection to English. This way, only the highlighted content is translated, while the rest of your feed remains untouched. Chrome’s translation tool is incredibly popular, with over 37 million users relying on its extension, though full-page translation is already built into the browser itself.
Translation in Microsoft Edge and Safari
Microsoft Edge offers a similar experience. When it detects a page in a foreign language, a translation icon appears in the address bar. To enable automatic prompts for translation, go to Settings > Languages and turn on "Offer to translate pages that aren’t in a language I read." Once the pop-up appears, you can select "Always translate from [Language]" to ensure future pages in that language are translated automatically.
Safari, available on Mac and iOS devices, also includes translation for certain languages. When Safari recognizes a supported language, a translation icon appears in the address bar. While Safari works seamlessly with Apple devices, its language support isn’t as extensive as Chrome’s.
To help you decide which tool suits your needs, here’s a quick comparison of these browser translation features:
Browser Translation Tool Comparison
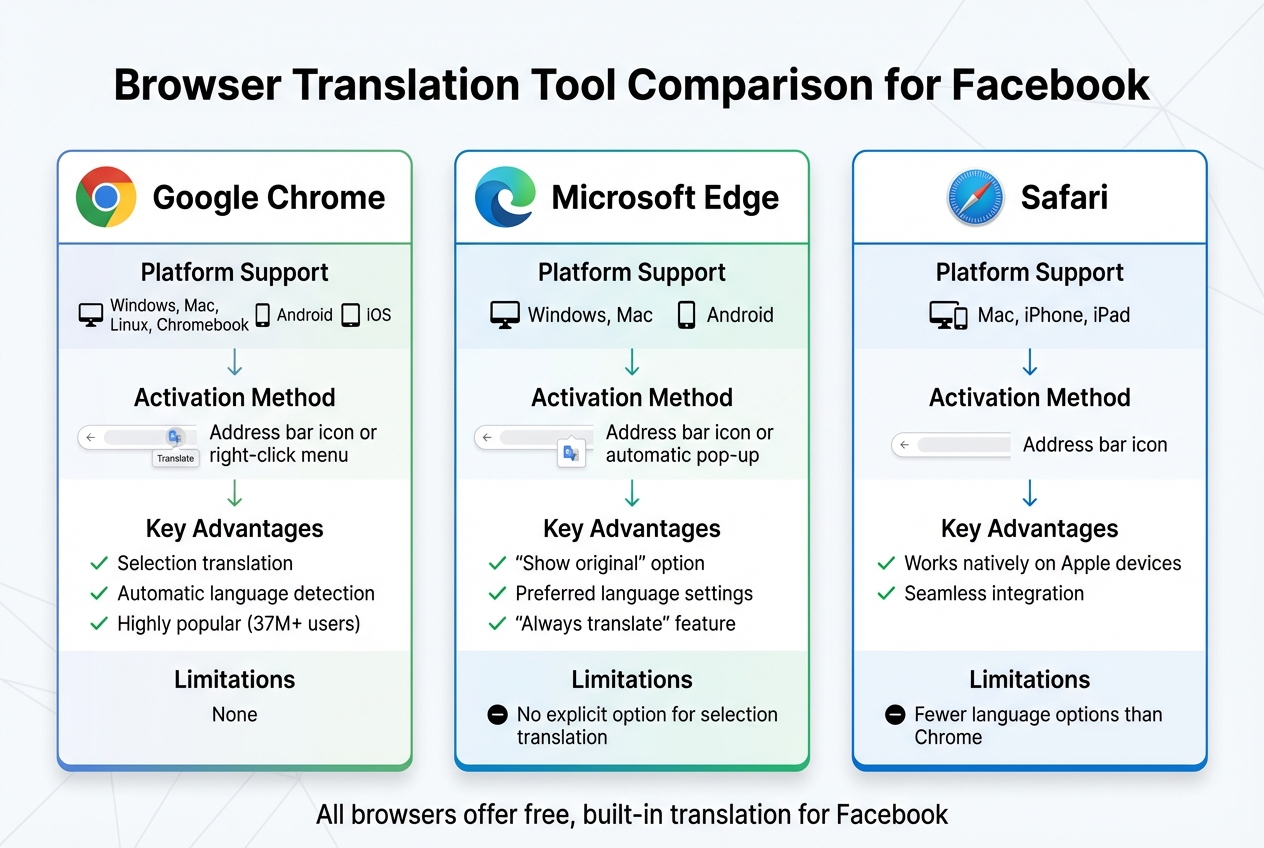
| Browser | Platform Support | Activation Method | Key Advantages | Limitations |
|---|---|---|---|---|
| Google Chrome | Windows, Mac, Linux, Chromebook, Android, iOS | Address bar icon or right-click menu | Selection translation, automatic language detection, highly popular | None |
| Microsoft Edge | Windows, Mac, Android | Address bar icon or automatic pop-up | "Show original" option, preferred language settings | No explicit option for selection translation |
| Safari | Mac, iPhone, iPad | Address bar icon | Works natively on Apple devices | Fewer language options than Chrome |
Chrome stands out with its precise right-click selection translation and wide language support. Edge simplifies the process with its "Always translate" feature, while Safari is a solid choice for basic translations on Apple devices, though its language range is more limited.
Using BeLikeNative for Facebook Translation
BeLikeNative takes the convenience of browser translation tools a step further by offering a tailored solution to translate Facebook posts instantly and efficiently.
How BeLikeNative Works with Facebook
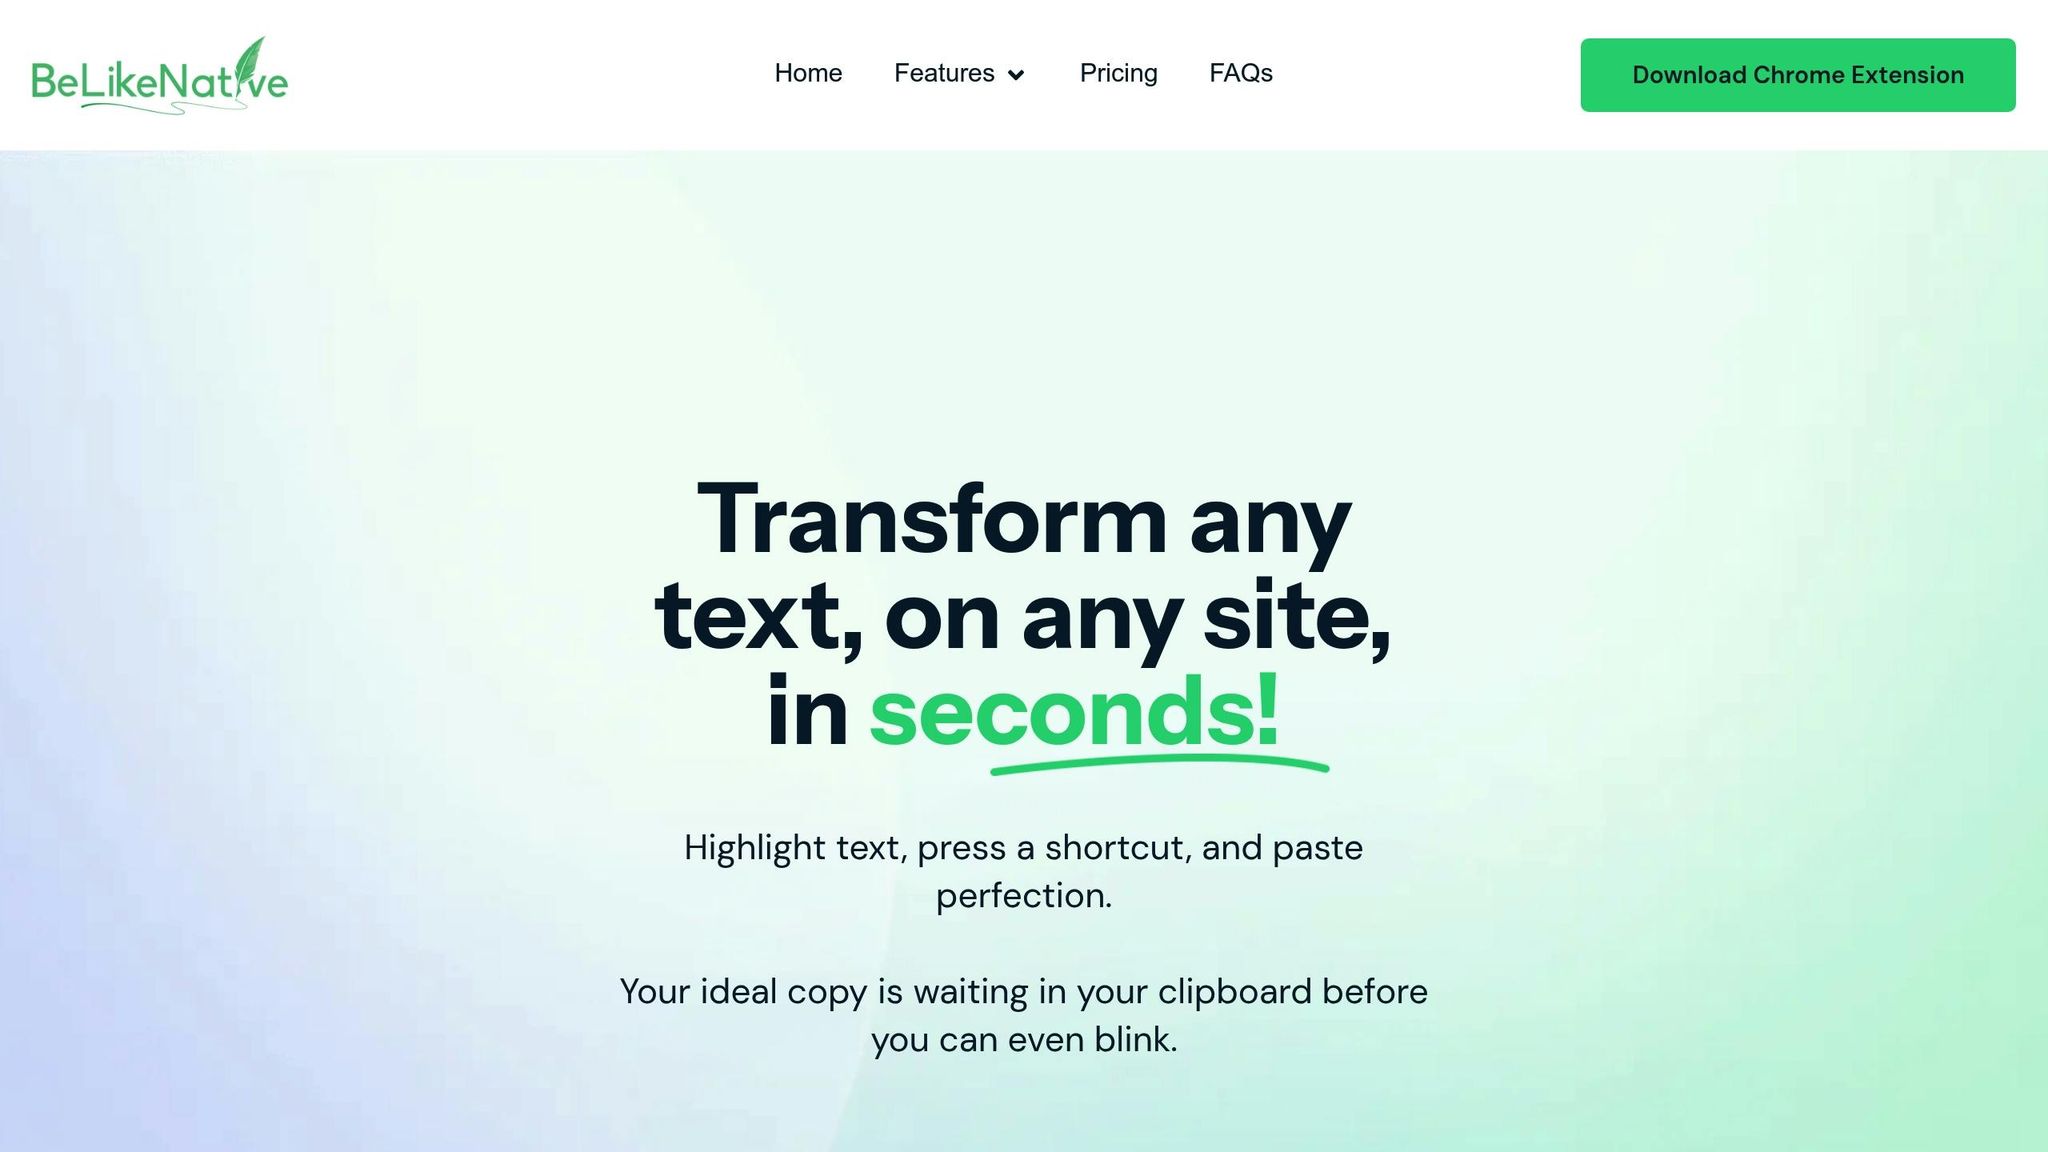
BeLikeNative is a Chrome extension that makes translating specific Facebook posts a breeze. By using a simple keyboard shortcut – Alt+E for Windows or Command+E for Mac – you can highlight text, translate it instantly, and copy the result. This refined translation can then be used across more than 100 platforms, including WhatsApp Web, LinkedIn, and Twitter.
This streamlined process eliminates the hassle of manual copy-pasting, saving you time and effort. Whether you’re navigating Facebook or other platforms, the same shortcut applies, making it a versatile tool that complements standard browser-based translation features.
Adjusting Translations for US English
BeLikeNative doesn’t just translate – it refines the text to match the tone and style of natural US English. Instead of a word-for-word approach, the extension transforms rough translations into polished, fluent English that feels native.
You can tailor translations further by selecting "Native English" as your target language in the settings and adjusting the tone to fit your needs. For casual Facebook interactions, a relaxed tone works best, while a formal style is ideal for professional comments or business-related posts. The extension supports over 80 languages and accommodates character limits ranging from 4,000 to 10,000, depending on your subscription tier. Users have reported a 66% boost in productivity thanks to these features.
BeLikeNative Pricing Plans
BeLikeNative offers a 7-day free trial for all paid plans. Below is a breakdown of the pricing options:
| Plan | Price | Daily Usage Limit | Character Limit | Key Features |
|---|---|---|---|---|
| Learner | $4.00/month | 50 | 4,000 | Edit functions, shortcuts, community access, premium support |
| Native | $6.00/month | 125 | 6,000 | Priority bandwidth, influence on extension updates, all Learner features |
| Premium | $14.00/month | 180 | 10,000 | Partnership perks, priority feature development, future lifetime license option |
The Learner plan is perfect for casual Facebook users who need occasional translations, while the Native plan caters to those who frequently interact with multilingual content. For heavy users translating large amounts of text daily, the Premium plan offers the most robust features.
sbb-itb-32359dc
Mobile Device Translation Features
Your smartphone comes equipped with built-in translation tools that work effortlessly with Facebook, complementing desktop options. Both Android and iOS offer features that make translating posts quick and straightforward.
Translation on Android
If you’re using Android, translating Facebook posts is easiest through the Google Chrome browser rather than the Facebook app. Open Facebook in Chrome, and if a post in a foreign language appears, you’ll usually see a translation prompt at the bottom. If not, tap the three-dot menu near the address bar and select Translate.
Want to translate just part of a post? Highlight the specific text within Facebook in Chrome, and a translation will pop up at the bottom of your screen instantly. Some devices, like the latest Google Pixels, even support Live Translate directly within the Facebook app. This built-in feature works seamlessly with Facebook, much like desktop translation tools.
To ensure smooth translations, check your Chrome settings. Go to Chrome Settings > Languages and verify that automatic translation is enabled. You can also set Chrome to "Always translate" specific languages so foreign posts are converted automatically without any extra steps.
Translation on iOS
For iPhone users running iOS 15 or later on models like the iPhone XS, iPhone XR, or newer, system-level translation tools are built right into the device. Within the Facebook app, simply touch and hold the text you want to translate, adjust the selection handles, and tap Translate from the menu that pops up. If you don’t see "Translate", tap the arrow icon to find it. A translation card will appear, letting you copy the text or open it in the Translate app for further options.
Need to translate text from an image or screenshot? Use the Live Text feature. Open the image in full-screen mode, tap the Live Text button (three lines inside a square) in the lower-right corner, and choose Translate. To change the translation language, tap "Change Language" and select English (United States). Make sure Live Text is enabled by going to Settings > General > Language & Region and toggling Live Text on.
Mobile Translation Tips for US Users
Fine-tuning your mobile translation settings can help ensure translations align with US English conventions. Set your default translation language to English (United States) in your device or browser settings to reflect regional preferences like spelling ("color" instead of "colour") and date formats (01/11/2026 instead of 11/01/2026).
For offline use, download your preferred languages by tapping "Download Languages" in your settings. If you’re on iOS, you can also use the "Listen" button (speaker icon) to hear the translated text aloud, which can help you confirm the phrasing sounds natural in US English.
Adjusting Facebook Settings for Better Translation
Setting Facebook Language Preferences
To avoid translation conflicts, it’s important to fine-tune Facebook’s language settings. Start by clicking your profile picture in the top-right corner, then select Settings & Privacy followed by Settings. From there, navigate to Language and Region in the left-hand menu.
Under the option for "Language you’d like to have posts translated into", choose English (US). This ensures that translations align with U.S. conventions – like using "color" instead of "colour" and displaying dates in the U.S. format. Next, look for "Languages to exclude from automatic translation" and add any languages you already understand or prefer to translate using an external tool. This stops Facebook’s "See Translation" button from cluttering your feed unnecessarily. Additionally, under "Languages you don’t want automatically translated," you can prevent Facebook from altering text before your external tool processes it. These steps ensure that your external translation tools work with the original, unaltered content for better accuracy.
Combining Facebook Settings with External Tools
Once you’ve adjusted Facebook, you can fine-tune your Chrome settings to complement these changes. Go to Settings > Languages > Google Translate in Chrome and set English (US) as the target language. Add commonly encountered languages to the automatic translation list. To avoid conflicts with tools like BeLikeNative, disable "Use Google Translate" and remove any unnecessary languages from Chrome’s "Preferred languages" list. This setup ensures seamless and accurate translations across platforms.
Conclusion
Why These Translation Methods Make a Difference
The methods discussed in this guide take the hassle out of constantly clicking the "See Translation" button. Tools like Google Chrome can translate entire Facebook pages as you scroll, while BeLikeNative delivers smooth, natural translations without requiring manual effort. On mobile, both Android and iOS offer quick, on-the-go translation features that make staying multilingual easier than ever.
These solutions are real time-savers for anyone juggling multilingual Facebook feeds. Instead of translating each post individually with Facebook’s built-in tool, automatic browser translations handle your entire feed in one go. Plus, BeLikeNative lets you translate text as you write comments, ensuring your responses feel polished and culturally in tune before you post. These tools simplify and enhance your multilingual Facebook experience.
How to Start Using These Tools
Getting started with these tools is simple and quick. To enable automatic translation in Chrome, go to Settings > Languages. Add the languages you often encounter to the "Automatically translate these languages" list and set English (US) as your preferred language. Once set, translations will kick in automatically without any extra steps.
For more advanced options, download BeLikeNative from the Chrome Web Store. Check the pricing table above to choose the plan that works best for you. The extension even includes a handy keyboard shortcut for instant translations, making your workflow smooth and efficient. Pair these tools with your Facebook language settings, and you’ll have a seamless translation system ready to use across both desktop and mobile platforms.
FAQs
How can browser tools help translate Facebook posts more easily?
Browser translation tools make it easier to read Facebook posts in different languages by translating text directly on the page. This means you don’t need to rely on the See Translation button anymore. Take Google Chrome, for instance – its built-in translator automatically detects foreign languages and lets you translate an entire feed or just specific sections with a simple click or right-click. Plus, it keeps the original layout intact.
For even more flexibility, the BeLikeNative Chrome extension stands out. It allows you to translate any highlighted text into over 80 languages instantly. On top of that, it offers context-aware translations and paraphrasing options to improve clarity. These tools not only speed up multilingual browsing but often provide more accurate translations than Facebook’s default feature, saving you time and effort.
What are the downsides of Facebook’s built-in translation feature?
Facebook’s translation tool comes with a few drawbacks. For starters, it only kicks in when Facebook identifies a post or comment in a language different from your primary setting. Even then, you have to manually click “See Translation” to view it – there’s no automatic translation. Plus, if you’re using the Facebook Lite app, this feature isn’t available, which can be a hassle for those relying on older devices or limited data plans.
When it comes to the translations themselves, they can sometimes miss the mark. Since the tool depends on Facebook’s machine-learning models, the results may include awkward phrasing or outright errors, making the translations feel less natural. On top of that, the tool is restricted to single posts and comments. It won’t help you translate entire pages, videos, or any embedded text, meaning you might need to turn to external tools for those tasks.
How do I enable automatic translations for Facebook posts on my phone?
You can enable automatic translations for Facebook posts directly within the app by tweaking your language settings. Here’s how:
- Open the Facebook app and tap your profile picture in the top-right corner.
- Navigate to Settings & privacy, then choose Settings.
- Look for Language and Region in the menu.
- Under Automatic translations, switch on the toggle or specify the languages you’d like to be automatically translated.
- Save your changes, and posts in those languages will now translate automatically – no need to tap "See Translation."
This simple setup allows you to effortlessly engage with content in multiple languages on Facebook.
